Sunday, February 15, 2015

Daydreaming - 7 Dots Studio January/February Challenge

Hello friends! I'm stopping in today to share my entry for the 7 Dots Studio January challenge "Appreciating the Little Things in Life".

With three little boys, life is usually very busy. So the first thing that came to mind when I thought on appreciating the little things is how much I enjoy those small, infrequent moments when everyone is fed, happy and entertained elsewhere, and I can just kick back and relax for a couple minutes. I selected a picture of me relaxing on the hammock at my in-laws' summer cabin - having the opportunity to ride the hammock in peace for a couple minutes only happens once or twice a summer, so I really appreciate those times (who wouldn't with that view?).


I used papers from 7 Dots' Dreamer collection - this is one of those collections I missed out on when it was first released, and have always coveted. Imagine how excited I was when Limor Webber brought it in a couple of months ago! I cut the squares out of one of the City Lights pages, then outlined the holes in black and affixed it to the B side of another piece of City Lights. I took the cut out pieces and outlined them in various colours, then layered them onto my background using foam tape.


I added additional colour to the background and squares using Shimmerz Inklingz, and splatters of 13 Arts Splash Ink and mist before adding my embellishments and photos.


To complement my outdoorsy photo I used lots of natural elements - cork stickers, bark wooden icons, a nest, flowers - and tied all the elements together with a touch of gesso.


Here is this month's Inspiration Circle. The challenge is open until February 19th.


Thank you for stopping by! I always appreciate your visit.


Supplies Used:

7 Dots Studio Dreamer Collection - City Lights x 2
Faber-Castell Stamper's Big Brush Pen - Black
Prima Mini Bouquet Rebecca 538569
Prima Serenity 571337
Prima Mini Sachet Rose 565954
Prima Bark Flowers 569297
Prima Seashore Paperclips 573089
Prima Stationer's Desk Wood Icons 572877
Prima Epiphany Cork Stickers 576172
Prima Cradle Robin 552899

Saturday, February 14, 2015

Grungy Valentine's Day Card

Hands up, everyone who finds male cards daunting. Yep, that's my hand way, way up there! But it's Valentine's Day, and I didn't want to give Evan a girlie pretty card, so I pulled out some of the Distress products in my stash, and set to work.


I started with a piece of Blue Fern Studios' Chunky Heart Panel chipboard, and ran it through an embossing folder to add some manly riveted texture before adding several colours of Distress Ink, with a final brush of Walnut Stain over the embossed bits and edges.


I ran an oversized Prima tag through the partner embossing folder, the added various colours of Distress Paints, some stamping, splatters of Splash! Ink and distressed and inked the edges.

Thank you for stopping in today - I hope you had a wonderful Valentine's Day with the ones you love.


Supplies Used:

Blue Fern Studios Chunky Heart Panel chipboard
Prima Julie Nutting Tag Pad
Distress Ink: Walnut Stain, Fired Brick, Rusty Hinge & Peacock Feathers
Tim Holtz Texture Fades: Diamond Plate & Riveted Metal
Distress Paint:

Friday, January 23, 2015

Go Outside and Play - Lindy's Stamp Gang January Color Challenge

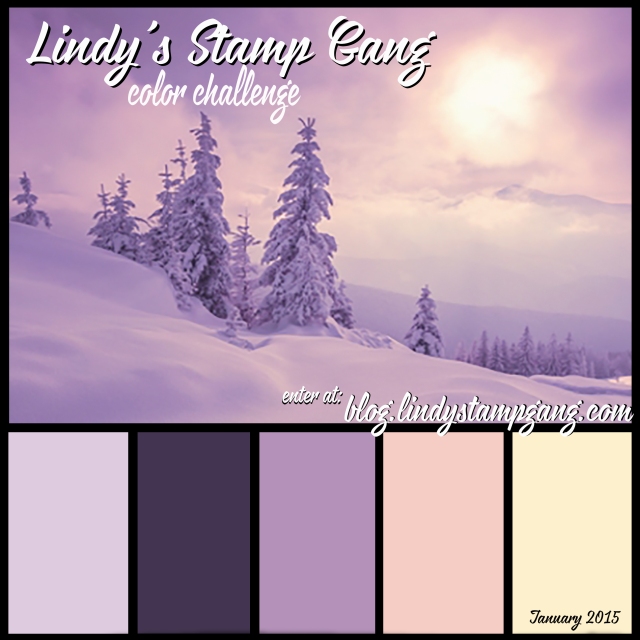
Have you seen the gorgeous purples in this month's Lindy's Stamp Gang Color Challenge? It just so happens that, as my 3 year old keeps reminding me, purple is my favourite colour (or one of them; I'm also partial to red!). So I pulled out my mists and embossing powders, combed through my wintery pictures (inspired by the gorgeous picture included in the color challenge) and set to work.


I started by using clear gesso on the background paper so that I could control where my mists ended up and blot up any mist I didn't want. Then I stencilled in some snowflakes using modelling paste, and set to work adding my colours. I outlined the snowflakes in black to help them stand out.


To bring in the coral colour from the palette, I primed the Blue Fern Studios' Lattice Fence chipboard (which I cut into three pieces) with gesso and spritzed it with Lindy's Cape Cod Coral, then sprinkled on some embossing powder (Magic Moon Pearls and Midnight Violet) while it was still wet and heat set it.


Once I got everything put together I wanted to bring in a little extra yellow in addition to the original background misting, so I added some yellow thread and glass beads.


To finish everything off, I added some chipboard snowflakes from Blue Fern Studios, primed white and sprinkled with super fine glitter for incredible shine.


Here is this month's Color Challenge if you're interested in playing along, too.


Lindy's Stamp Gang Products Used:

- Embossing Powders: Magic Moon Pearls, Midnight Violet
Wicked Witch Purple

Other Products Used:

- Blue Fern Studios chipboard: Lattice Fence, Shabby Flakes
- 7 Dots Studio Cold Country collection: Secret Diary, As It Was Before,
Elements, Element Stickers
- 7 Dots Studio Love Is In The Air: Thunder Of The Sea
- Liquitex: Clear Gesso, Light Modeling Paste, White Gesso
- Crafter's Workshop 6x6 snowflake stencil
- Stabilo Aquarellable pencil: Black
- Georgia Heald/Scrapbook Diaries Zipper stamps
- Faber-Castell Stamper's Big Brush Pen: Black
- 13 Arts Splash! Ink: White
- Prima 3D Gloss Gel
- Prima Glass Beads: Butter
- Superfine Glitter

Tuesday, January 20, 2015

Beach Boys - Prima January PPP

This month's Prima PPP challenge is full of delicious blues and blue-greens, perfect for boy projects! And though it's the dead of winter, the colours suggested a beachy project to me, as well as a chance to use a Prima product I've been hoarding like a miser for the past year (pretty much to the day, as I picked it up at Prima ArtVenture last year) - the Ingvild Bolme Altered Metal Frame.


Though the frame comes gorgeously distressed, I wanted to build additional colour onto it, so I started by sponging on some heavy gesso, then applied three blue Color Bloom sprays: Soft Teal, Summer Sky and Cobalt.


The top of the frame was perfect for a Winthrop vine, with a distressed resin piece adhered to the front.


To create my beachy scene I started with a page of the aptly named Seashore paper for the background, then added some pieces of Blue Fern Studios' Country Picket Fence and some gauze sprayed with Color Bloom in Tea Stain.

To add some depth to the resin pieces, I sprayed them with Color Bloom in Worn Leather, then blotted it off the raised areas. And then finished everything off with more gorgeous Prima blooms!


Prima Products Used:

- Ingvild Bolme Altered Metal Frame
- Seashore collection: Sea Horse 12x12 paper, 3x4 ATCs
- Ingvild Bolme Shabby Chic Treasures Resins: Frames (89211),
Dell' Arte (891466), Shells (891985)
- Wintrop Vine (577704)
- Color Bloom sprays: Soft Teal, Summer Sky, Cobalt
Tea Stain, Worn Leather
- Cradle Robin nests (552879)
- Abbey flowers (571801)
- Say It In Crystals Free Spirit (573164)

Blue Fern Studios Products Used:

- Country Picket Fence

Monday, January 19, 2015

Cute Stuff - Prima January BAP

The Prima BAP is one of my favourite challenges to play along with, even more so on the months where the sketch was created by one of my best scrappy friends, the incomparable Jennifer Snyder. This month's sketch is another beauty, and I was inspired by the use of two smaller photos to sort through my photos to find two I'd like to use. Using PicMonkey I made them into a collage, and set to work. I am so happy with the way this layout turned out - it exceeds what I pictured in my mind, and then some!


And here is this month's Prima BAP sketch:


I started by adding some chevron stencilling to the Time Traveler "Tickets Only" paper using super heavy white gesso; after that dried I painted on Shabby Tote Chalk Edger with a wet paintbrush and blotted it off for a subdued aged effect.


I added strips of scrap paper from various collections, inked with chalk edgers for a bit of definition, as well as some resist canvas coloured with Gold Foil Color Bloom vertically on the page (I also splattered Color Bloom on the background).

Though there wasn't a vertical strip in the sketch, it felt right for my layout; I cut peek-holes through the Stationer's Desk "Captured Drama" paper, defining them with Dark Bark Chalk Edger. I mounted the strip on a backing of chipboard pop outs to give it more dimension.


To create a centrepiece for my photos inspired by the sketch, I used a chipboard circle painted with Color Bloom in Antique Gold, and topped it with Wire Thread in Rose Red. The bow is also Wire Thread - perfect for such a task as it keeps its shape! Prima flowers and leaves in muted colours, as well as Prima metal accents, contribute to the rustic feel of the layout.


For the cluster on the bottom right I incorporated many of the elements used in the larger cluster, adding a resin frame coloured with Color Blooms, and a chipboard title that perfectly sums up my cheeky little monkey.


Thank you for stopping by today!

Prima Products Used:

- Time Traveler collection: Tickets Only
- Stationer's Desk collection: Captured Drama
- Cigar Box Secrets: Corona & Presidente
- Chalk Edgers: Dark Bark & Shabby Tote
- 12 x 12 Mask: Chevron
- Resist Canvas Borders 4
- Color Bloom Sprays: Gold Foil, Antique Gold, Worn Leather
- Wire Thread: Rose Red
- Junkyard Findings: Industrial Lamps, Wall Lamps
- Prima Resin Frame: Baroque Frame

- Flowers: 
Capri - Cabernet
Hillsboro - Butter
Rodanthe - Seashell
Rondanthe - Sandbank
Florella - Leaves

Blue Fern Studios Chipboard:

- Graduated Circles
- Good Vibes
- Roman Clock Set - Small

Wednesday, December 31, 2014

A Couple Christmas Ornaments to Close Out The Year

Well, it's here, the last day of 2014. As you look back, how was your year? As I look back I feel peaceful, so I guess all in all ours was good - I certainly don't have that "Thank God that year's behind us!" feeling I've had a couple of other years (2009 being one of the worst offenders). 2015 is so far shaping up to be an exciting year, with a big extended family trip to Greece in the works, so I'm also looking forward with a happy heart.

December 31st marks my last official day on the Blue Fern Studios Design Team, and my last day with Flying Unicorn was December 15th, and I haven't pursued any design teams for 2015 (yet?!?), so I'm feeling a little adrift right now, though having the opportunity to recharge my scrappy batteries over the past month has been refreshing. I'm incredibly thankful for my time on both of these wonderful teams, and look forward to watching each company continue to grow.

Today I'm sharing my last couple of Christmas projects, some wooden Christmas ornaments by Julie Nutting for Prima (available in the Flying Unicorn Store in case you want to stock up for next year now). I mounted each of the ornaments with repositionable adhesive Glue Dots on gift tags, so they can be removed and hung on the tree.

The first ornament, Santa's Helper, was coloured with Copic Sketch markers, with details added with a black journalling pen and white Stamper's Big Brush Pen. The background of the tag is Cigar Box Secrets from Prima, which surprisingly was my go-to Christmas line this year, even though they aren't Christmas papers.


I was surprised by how well alcohol markers worked on this wood surface - because it is a manufactured wood the grain goes in every direction as you can see in the photo below, so the colour does not get wicked into other areas of the design.


The second ornament is Starr. For this ornament I played around with different media - Prima Crackle Paste for the star, embossing powder for the jacket and holly, puff paint for the collar and headband, Prima Chalk Edgers for the skin, Liquid Pearls for the buttons, metallic Distress Paint overlaid by crackle medium and white acrylic paint for the wings, with an Aquarellable pencil for the details.


As you can see, the different media add a lot more dimension to this tag.


My last ornament is another Starr, this one done more simply. I used Krylon Gold leafing pen for the star, with a black Copic maker on the interior to add contrast. She was coloured with Copics and a journaling pen, and her wings were done simply with white paint outlined with an Aquarellable pencil in black.


Thank you so much for stopping in today. My best wishes for a healthy, happy, productive 2015 to you and yours!


Monday, December 29, 2014

Bloom Girl Gift Bag

I'm stopping in tonight to share another Bloom Girl project I coloured while on vacation, this time a gift bag I gave out at Christmas. This time I used the Summer stamp, colouring in the scroll in her hair with a gold leafing pen, and covering the summery flowers, bees and berries with poinsettias.


The poinsettias are cut from Prima Cigar Box Secrets paper and edged in gold leafing pen, with Prima Glass Beads as centres. The greenery (which in this case is blue hehe) is also cut from Cigar Box Secrets.


A little closeup of the colouring, using Copic markers.


Thanks for stopping by!

Supplies used:

- Prima Bloom Girl stamp: Summer
- Prima Cigar Box Secrets paper: Robusto, Corona, Panatela
- Copic Sketch markers
- Kroma 18 Karat Gold Leafing Pen
- Prima Glass Beads: Butter
- Spellbinders Layered Poinsettia die