Monday, November 10, 2014

Blue Fern Studios - 2 Christmas Cards and a Tutorial

I'm up today on the Blue Fern Studios blog with my November projects.

Christmas season is fast approaching - can you believe it? Every year I promise myself I will be better organized and start my Christmas cards early, and nearly every year I end up re-using gift tags I made in previous years - but not this year! This year I'm getting an early start on my Christmas cards, using some gorgeous holiday-themed chipboard. And in the process I came up with a technique for easily adding lots of colour to detailed chipboard - don't you just love when creative inspiration strikes?

I found the idea for a shadow box card on Pinterest and couldn't wait to try it out for myself. Because Blue Fern papers are so thick, I didn't need to use a cardstock base, I built the card directly from my background paper. Though not a Christmas paper in and of itself, the Picnic paper from the Blue Fern Garden collection easily lends itself to Christmas projects.

Here is a side view of the card showing the dimension of the shadow box.


I love the Holiday Wreath set, and was loath to discard the punch out pieces, but that left me with a dilemma - how could I colour the insets and outer portions in different colours? My end solution was a combination of poster pen, glitter, leafing pen and alcohol markers, covered with frosted crystal embossing powder to prevent the colour looking flat.


I mounted the Christmas Tree from the Let It Snow set on Blue Fern Studios' signature chipboard packaging, punched out the wavy bits and treated those with a snow medium, and while that dried heat embossed the tree with two colours of embossing powder. The stump is made from a punch out piece from another piece of chipboard (I always save these because you never know when they'll come in handy).


Blue Fern Studios Products Used:

Blue Fern Garden paper: Picnic
Blue Fern Studios chipboard packaging
Chipboard: Holiday Wreath Set
Let It Snow Set

I was so pleased with the way the wreath turned out I created a second card with a photo tutorial to show the process.


I began by adding my highlights - for this piece I used a white poster pen to fill in the whorls in the wreath. There are a couple punch outs missing - don't worry, it won't be noticeable unless you're looking for them.


I then began adding colour using alcohol markers. The brush tip allows for precision, and the alcohol ink is not water soluble so it will stay where you put it. For this wreath I chose to only use one colour of ink, however as you can see from the first card, you can use as many colours as you'd like to achieve the look you're after.


I covered the piece with embossing ink, and then with a silverizing embossing powder, tapping the piece off so that the coverage was heavier in some areas than others.


Here is the finished piece ready for my card. The embossing powder gives the piece beautiful sheen and lots of texture.

And here is the finished card:

The mittens from the Cozy Christmas set made a perfect accent piece for the wreath, heat embossed with three different colours of embossing powder (I used a paintbrush to paint on the embossing ink to keep the colours from mixing).


Some red glitter glue completed my holiday wreath.


Blue Fern Studios Products Used:

Blue Fern Garden paper: Signature
Ombre Dreams paper: Susan's Dream
Chipboard: Holiday Wreath Set
Cozy Christmas

Thank you for your visit today!

Monday, November 3, 2014

Life is Breathtakingly Beautiful tag - Flying Unicorn November KOM

The Flying Unicorn November Your Passion, Your Art kit contains a beautiful package of Bo Bunny Madeleine ephemera, and they are so lovely this tag was a snap to put together with just the addition of some chipboard stickers and buttons from the same collection, so Prima flowers and some pearl trim.


Supplies Used:

From the Kit and Add-Ons:

- Bo Bunny Madeleine Noteworthy Journaling Cards
- Bo Bunny Madeleine Chipboard Stickers
- Bo Bunny Madeleine Buttons
- Prima Flowers: 577759
- Pearl Trim

Sunday, November 2, 2014

Julie Nutting Wooden Doll Minis Altered Jar - Flying Unicorn KOM

The November Kit of the Month and Add Ons contains a jar of Julie Nutting Mini Wooden Dolls from Prima. I loved the jar as soon as I saw it, and in my head I saw the Bo Bunny adhesive stencils as a perfect partnership with this jar and the project bloomed from that.


I started by stencilling with the Bo Bunny stencil and Prima 3D Gel Medium to achieve the pattern, and once that was dry, painted over it with white gesso.  Once dried I added the Lindy's sprays from the kit and add-ons, and later Silks paints to add depth of colour and a bit of shimmer. I love how it brings out the texture on the gesso, as well as the relief of the gel medium images.


For my jar topper, I die cut a doily using a Prima die and the Bo Bunny paper from the kit, which I adhered to the top of the lid with gel medium. I then added flowers and the door chain from the kit, cutting the Petaloo vine into smaller bits to fill in the cluster.


A closeup of some of the detail from the stencilling.


The flower cluster, including one of the Ingvild Bolme Door Chains.

Thank you so much for stopping by today! I hope you're having a wonderful weekend.

Supplies Used:

From the Kit:

- Julie Nutting Mini Wooden Dolls Jar
- Bo Bunny Stickable Stencil: Bliss
- Lindy's Stamp Gang Sprays: A Bit O' Bubbly, Autumn Maple Crimson, California Poppy Gold
- Viva Pearl Pen: Gold
- Bo Bunny Madeleine papers: Roses
- Prima Shabby Chic Treasures: Door Locks
- Prima Flowers: 577667, 577483
- Petaloo Flowering Vine Spray: Red

From my stash:

- Prima 3D Gloss Gel
- Liquitex Gesso: White
- Prima Snowflake die
- 13 Arts Gel Medium
- Silks: Vavoom Red & Emperor's Gold


Blue Fern Studios November Sketch Challenge

It's time for a new sketch challenge from Blue Fern Studios, and as always, there are gorgeous Blue Fern chippies up for grabs for a lucky winner! 

This month I'm playing with the gorgeous Montage paper collection, full of bright colours and beautiful motifs.


Here is Michele's wonderful sketch to get your creative juices flowing:


I love the versatility of chipboard - it allows you to load on texture, dimension and colour without adding a lot of bulk. I've used chipboard from 5 different sets on this layout, treated in 4 different ways.


I treated the Collage Frame and Deco Shelf with a multi-toned embossing powder, and pressed a stamp into the molten powder to bring out the various colours.


I cut the Jewelled Page Dangle into three pieces, and gave it a simple coat of black chalk ink for an incredible pop of contrast. One of the Mixed Chains was also cut into smaller pieces and I dabbed dimensional shimmery paint onto it with my fingertip.


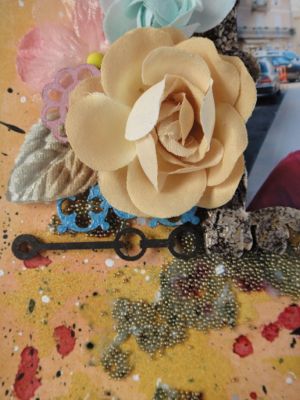
 The Bohemian Flowers were treated with pink chalk ink and then sprayed with a gold mist for a little extra sparkle before I tucked them into my clusters.


I hope you'll join in our challenge this month! Remember, the only requirements are that you follow the sketch and that you use some Blue Fern Studios products on your layout. Wondering where to buy Blue Fern products? There is a comprehensive list on the Blue Fern blog.

Blue Fern Products Used:

Paper: Montage

- Invitation
- Bouquet

Chipboard:

- Collage Frame
- Deco Shelf
- Mixed Chains
- Bohemian Flowers
- Jewelled Page Dangles


Saturday, November 1, 2014

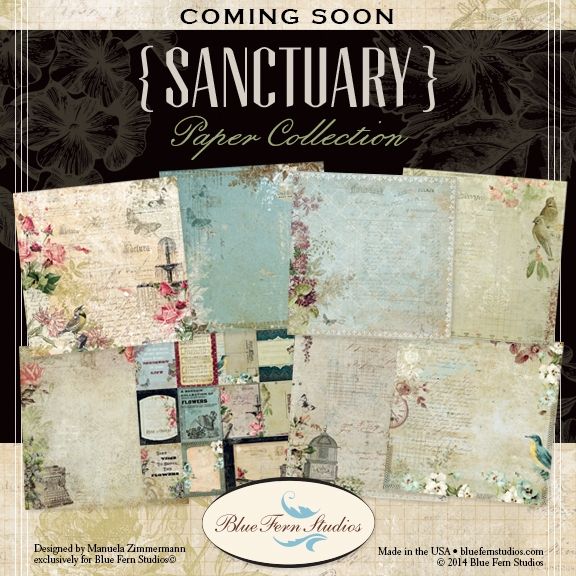
Presenting Sanctuary - a New Paper Line from Blue Fern Studios

Blue Fern Studios is proud to unveil a sneak peek of its new paper line, Sanctuary:


Don't you just love those vintage colours and images? And wait until you see the flip sides, with some beautiful jewel tones. I can't wait to get my hands on these papers - how about you?

Chicken Wire Heart Wreath - Flying Unicorn Kit of the Month

The Off-The-Page project from the November Flying Unicorn Kit of the Month is a wood and chicken wire heart from Darice. I paired it with the three canvases from the Mixed Passion Add On and the cute little birdies from one of the Bo Bunny Madeleine papers to craft a decoration I can hang on my door in the springtime - or just to bring a feeling of springtime to these dreary fall days.

I painted the white frame with some Shimmerz in Pink to coordinate with my birdie canvases, then set to work on the rest of the project.


I did an image transfer from the papers to the canvases using Gel Medium, ensuring that the paper wrapped around to cover all the sides of the canvas for a more finished look. I also added a little stamping with a music note stamp.


The image transfer doesn't have to be perfect to be pretty. A couple little imperfections (such as in the canvas below, where I rubbed a little too hard in a couple of places) simply give the canvas a little more of an edge-worn appearance, which adds to the shabby charm.


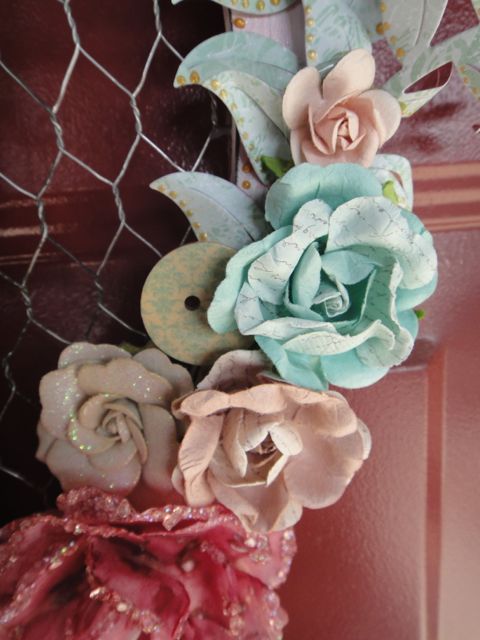
The resin birds were perfect layered on to of blooms and buttons from the kit and add-ons. I coloured the big vellum flowers with Autumn Maple Crimson Lindy's spray from the kit, and cut vines from some of the Bo Bunny paper, which I finished off with the gold pearl pen included in the kit.


I love the sparkle on the white Prima flowers!


Thanks for stopping by today! If you didn't pick up your kit on pre-order, be sure to check the Flying Unicorn Store to see if any are left. Remember, pre-orders of our kits open up on the 20th of each month - this is your chance to preview the kit, and order whichever kit or add-on interests you. Not only are you sure to get what you want, domestic customers will often receive their order by the release date of the kit. And there's no obligation to buy - if a certain month's kit doesn't appeal to you, or circumstances don't allow you purchase a kit for a couple months there is no penalty.


Supplies Used:

From the Kit and Add-Ons:

- Darice Poultry Wire Heart
- Canvases
- Bo Bunny Madeleine papers: Allure, Madeleine
- Prima Vellum Flowers: 577858
- Lindy's Stamp Gang Spray: Autumn Maple Crimson, A Bit O' Bubbly
- Prima Flowers: 577677, 577643, 577483
- Prima Shabby Chic Treasures: Resin Birds
- Petaloo Flowering Vine Spray: Red
- Flying Unicorn Metal Adornments
- Viva Pearl Pen: Gold
- Bo Bunny Madeleine Buttons

From my Stash:

- 13 Arts Gel Medium
- Kaisercraft Stamp: Sheet Music
- Memento Tuxedo Black Ink
- La-La Land Craft Dies: Large Flourish, Creepy Vines
- Tim Holtz Idea-ology: Jump Rings


Friday, October 31, 2014

Prima October PPP Challenge

The last couple of days of the month are generally me time to play at some challenges once all my design team projects are done. Among my go-to challenges are the Prima BAP and PPP. Although it's down to the wire again, I did find the time to play along with the PPP this month.

I took the PPP in a whimsical direction this month, playing with the pattern of the Montgofilere paper and a picture of one of my little stars, Brennan.


And here is the lovely inspiration mood board:


Here are some closeups:


Prima Products Used:

Cartographer paper: Montgolfiere
Color Bloom Sprays: Antique Gold, Gold Foil, Lime Wedge, Iris
Chalk Edger: Tin Can
Wire Thread: Lime Green
Le Mia Flowers: White (571511)
Junkyard Findings: Water Taps
Cartographer SIIC

Blue Fern Studios Chipboard:

Twilight Garden Frame
Sail Away
Seeing Stars