Friday, January 3, 2014

Flying Unicorn January Kit Reveal - Part 2

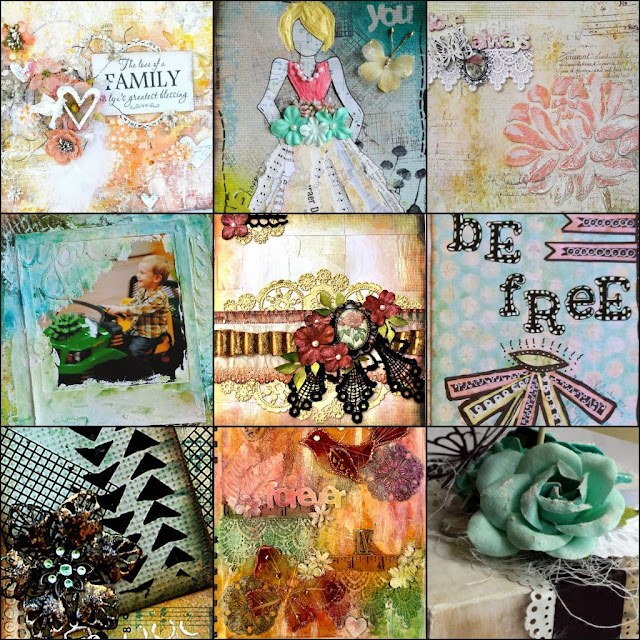
There are some exciting changes to the Flying Unicorn Kit of the Month starting this month, but one staple remains unchanged, something that sets Flying Unicorn kits apart, and that is the inclusion of an off-the-page project in every kit. This month the kit includes a fantastic mixed media Finnabair art journal from Prima. Included in the Mixed Art add-on are Lindy's Stamp Gang mists and 13 Arts Gesso, and the Small Art, Big Passion add-on features Prima Vintage Vanity papers by Finnabair and Flying Unicorn laces and Adornments. I paired these with some Luminarte Silks, now available in the Flying Unicorn Store to create my art journal cover.


I coloured the outside edges of the journal with gold Silks, and added masking to the top using the 13 Arts gesso and Clearscraps mask over Primary Elements in Coral Berry. I then layered torn strips of Vintage Vanity papers for my background and started misting!


The Flying Unicorn Metal Adornments were painted with Silks; I also added touches to the clear resin pieces to help blend them.


I love the look of the black Venise lace in the kit, but it was too bold for my project. To achieve the sumptuous look below, I started by roughly covering it with gesso, and once that was dry I dabbed on Silks in Emperor's Gold and Vavoom Red.


To create my butterfly I cut apart the petal of one of the metal flowers for wings and layered one of the other metal pieces overtop.

I hope you've gotten your kit - if not, hurry over to the Flying Unicorn Store, they won't last long!

Supplies Used:

From the kit:

- Prima Art Journal
- ClearScraps Stencil: Shattered Glass
- 13 Arts Gesso
- Lindy's Stamp Gang Grab A Guy Gold
- Prima Vintage Vanity papers
- Flying Unicorn Black Venice Lace
- Flying Unicorn Metal Adornments
- Prima Candy Gums Berry

From my stash:

- Luminarte Silks: Emperor's Gold, Vavoom Red, Ginger Peach
- Luminarte Primary Elements: Coral Berry
- Gel Medium
- Prima 12x12 Checker Stencil
- Tim Holtz Distress Inks: Rusty Hinge, Vintage Photo
- Viva Pearl Pen: Sunny Yellow


Thursday, January 2, 2014

Flying Unicorn January Kit Reveal - Part 1

Happy New Year! I hope that 2014 is off to a good start for you, and wish you peace, love, happiness and health this year. 2014 is sure starting off with a bang for me - Evan, the boys and I are skiing up at the mountain with some of our family for Christmas break, and almost as soon as we get home I will be turning around and leaving again for Los Angeles to attend Prima Art Venture and CHA. I can't wait to reconnect with old friends, meet some more online friends in person, play with new Prima goodies and see what new releases will be coming out soon. Then all my boys, my sister, and hopefully my brother-in-law will be joining me for several days in Disneyland to celebrate my 35th birthday. It's going to be a whirlwind of a month.

Have you had a chance to check out the new format for the Flying Unicorn Kit of the Month? If not, here's a short recap:

The Main Kit remains unchanged, including the awesome Off-The-Page project. But the Add-Ons have been completely redesigned to give you more of what you want now.

The Mixed Art Add-On ($24.99) is a mixed media lover's dream which can be enjoyed on its own or as a complement to the main kit. It includes a canvas and a mix of inks, mists, trinkets, gesso, modelling paste, crackle, etc.

The Mixed Passion Add-On ($24.99) is a mixture of embellishments to complement the main kit, Mixed Art Add-On and Small Art, Big Passion kit. It includes 3-4 packs of flowers, as well as resins, chipboard, trinkets, adornments, lace, trims, etc.

Small Art, Big Passion kit ($19.99) is a mini kit that can be used on its own for cards, tags and ATCs or as a complement to the main kit. It includes 6x6 or A4 papers, lace, trinkets, cardstock and various embellies.

I get all 4, and let me tell you, my 4" deep shipping box was packed to bursting!

On to my first project with the new kit. When the CT received the kit we all had the same question - who was the manufacturer of these gorgeous papers? As it turns out, it is a Prima limited release of Jodie Lee Art Journal papers (click here for a view of each piece of patterned paper), each with a multi-layered background that will get your creative juices pumping.

Young At Art

I took this picture of my kids' and nieces' and nephew's hands after doing some art journalling with them up at the family's summer cabin. We set up a large folding table out on the deck in the sun and let them get messy, and we had great fun!


These thick, sumptuous papers are perfect for distressing, and because of their weight stand up really well to media. I started by stencilling the background using the Prima Butterflies stencil and the amazing 13 Arts Gesso (this stuff is THICK!), then sprayed over it with the Lindy's Stamp Gang sprays from the Mixed Art add-on.


I added some stamping for extra visual interest.


Stencilling with Shimmerz Dazzlerz in Lemon Drop (now back in stock at the Flying Unicorn Store) behind my cluster; I used the 13 Arts Water Paints (love these, they are thick and opaque) on the die cut leaves.


The "art" in my title is one of the chippies from the kit painted with Shimmerz Dimensionz and a touch of gesso.


More touches of 13 Arts paint on corrugated cardboard.

Grab your kit and add-ons while you can - once they're gone, they're gone!

Thanks for stopping by!

Supplies:

From the kit and add-ons:

- Prima Jodie Lee Art Journal papers
- 13 Arts Paints: Matte Coral, Matte Lemon, Matte Pink
- 13 Arts Gesso
- Kaisercraft stamp
- Maya Road words
- Lindy's Stamp Gang Starburst Sprays: Wild Honeysuckle Coral, Maidenhair Fern Green 
- Petaloo and Prima flowers

From my stash:

- Shimmerz Dimensionz Blue Lagoon
- Prima Divine Alphas
- La La Land Dies: Creepy Vines and Large Flourish
- Prima Wooden Birds
- Dylusions White Linen spray
- Dylusions Stencil
- Lindy's Stamp Gang Embossing Powder: Scotch Broom Yellow

Wednesday, January 1, 2014

Flying Unicorn January Kit of the Month Release

We are so excited to share and to reveal to you the changes in our Kit of the Month!

We begin with out MAIN KIT and the INCLUDED off the page project :


http://www.flyingunicornstore.com/Kit_of_the_month_s/1249.htm

Not many changes to the main kit. You will get the latest and the greatest in the main kitto get your creative mojo flowing and we will always include an off the page project ( OTP) that will inspire and sometimes challenge your inspiration- but always creative fun !
We will no longer give names to our monthly kits - they mean nothing. What matters is Your Passion .Your Art !

Welcome to the Mixed Art! Our new add on kit will always come with a canvas and a variety mediums, mists, tools that compliment that main kit.


Our Mixed Passion add on kit if filled with flowers, ribbons, trinkets and more. Jam packed with embellishments that compliment the main kit.


Small Art. Big Passion is exactly what this new add on kit is filled with. Papers that are on a smaller scale that will compliment the main kit and embellishments that are scaled to compliment the main kit or to entice you to create cards, tags, atc's and so much more !


The Flying Unicorn Creative Team fell in love with the changes that we have done - and it shows! Look at the incredible inspired projects:


http://www.flyingunicornstore.com/Kit_of_the_month_s/1249.htm

Our educational creativeness will remain in full force in 2014! Join Erica this month for our BAP (Build a Page) project and Lynne as she shares some awesome techniques on our You Tube Channel.


January's YOUR ART. YOUR PASSION. IS NOW AVAILABLE! Like the years past - Art should be a passion and not an obligation - so there are no sign ups for our kits and once they are gone they are gone!

Blue Fern Studios January Sketch Challenge

Happy New Year! Not only is it a new year, but it's the beginning of a new month, and that means a new sketch challenge at Blue Fern Studios. I have always loved playing along with the Blue Fern sketches, and am delighted to get to do so as a member of the 2014 Design Team!

Here is this month's sketch from the incredibly talented Michele Singh.


Although you do not have to use the specific Blue Fern chippies used in the sketch, I LOVE the Winter Page Dangles and couldn't wait to use them on this layout.

This is a picture of my two youngest cuties. I don't know what it is about ski gear, but these two have been obsessed with putting it on ever since they could stand. Brennan, our middle son, has been skiing for a year now, and Colby, at 2.5, can't wait to get started and regularly steals his brothers' helmets and goggles. I foresee a lot of tears this year as his brothers suit up for ski lessons and he's still too young to go (though we do plan on getting him out on the bunny hill on a leash). The "Photo Op" words from the Picture Perfect set were perfect for this photo - I don't have many of these two together.


Because the colours of the photo are so neutral, I wanted to add color to the layout and began by smearing yellow acrylic paint across the background, then added some stencilling and stamping to tone it down a little bit.


I painted each of the dangles in gesso, then added a couple of shades of the same colour to each one for some depth, and finished them off with Stampendous Aged Embossing Enamel - I love how in addition to the dominant colour it also contains gold or silver and black, adding more dimension to the piece. A little touch of gesso on my finger finished the coloured bits off.


I left the chain parts of the dangles white so that the shapes would stand out, and made sure to assemble my cluster so that the shapes could still be seen - why cover up those cool little details?


I mounted my photo on a piece of the Tattered Diamond Bits, which I treated simply with gesso and some blue paint.


A closeup of some of the background details.


Blue Fern Studios Chipboard Pieces Used:

Winter Dangles
Picture Perfect
Tattered Diamond Bits

Thank you for stopping by! Check out the Blue Fern Studios blog for details on entering the Sketch Challenge and to see the beautiful chippies up for grabs. 

Tuesday, December 31, 2013

Last Minute Take on December Blue Fern Sketch

The end of the month is generally my play time, when all my DT projects are done and I haven't yet started on the next month's projects. And though my DT position with Blue Fern Studios doesn't start for another day, officially (ok, in reality a number of hours, LOL), I couldn't resist playing along with the December sketch.


I don't take a lot of Christmas photos. I always mean to, but in the excitement of Christmas morning it never happens. Or when it does, the photos are chaotic. So instead of using a Christmas tree, I substituted the larger of the Creepy Trees, and paired it with this darling photo of my friends' daughter buried in leaves.


I treated the tree with crackle paint, and once it was dry sprayed it with brown and black mist to accentuate the crackles. Didn't it give it a lovely shimmer in the process?


For the Shabby Brick Bits, I wanted to achieve a lacquered effect. I started by colouring the piece with a black Gelato, then went over the whole thing with Glossy Accents.


And some Shimmerz flicks to finish everything off.


 I just had to mention, too, that the Messy Head Papers from 7 Dots Studio were designed by fellow incoming Blue Fern Studios Design Team Member Olga Heldwein.

Not much time left to play along, but fear not, the January sketch goes live tomorrow. Play along for your chance to win some Blue Fern Studios chipboard!


Supplies Used:

Blue Fern Studios Chipboard

Creepy Trees
Shabby Brick Bits

Other

Prima Brick stamp
Crafter's Workshop 6x6 Brick stencil
13 Arts Ayeeda Gesso
Shimmerz Spritz: Bed of Roses, Seafoam and Truffle
13 Arts Peal Mist: Black
Tim Holtz Vintage Photo Crackle Paint
Shimmerz Shimmerz: Tickle Me Turquoise and Jilted Jade

Saturday, December 28, 2013

A Wintery Tag Card

Just stopping in for a quick share tonight of another Christmas card I whipped up at the last moment.

I love how versatile Blue Fern Studios chipboard is for layering. To make this partridge in a pear tree tag card I combined Distress Stains and Inks on the background, then added some stamping and rub-ons.

I painted the tree and bird with liquid acrylic paint, then brushed some gesso onto the tree with a dry fan brush and added some brown lowlights to the bird.


For the moon in the background I used the smallest of the Blue Fern Graduated Circles painted with gesso. I adhered it to the page and then painted the inside with embossing ink and filled it with a luminous embossing powder - the photos don't do the shimmer justice.


I hope you had a wonderful Christmas!

Monday, December 23, 2013

Last Minute Christmas Card

Hello bloggers! I don't know about you, but I'm a teensy bit behind on my Christmas preparations this year. I had all the best intentions, but... As I was wrapping presents the other night I was also forced to make a couple cards and tags on the fly. Most of them were not works of art (after all, most of the kids in the family aren't even going to look at the tags other than to check for their name), but I spent some extra time to make this one for my dad and stepmom since it will hold the Michael Buble tickets we bought them.


It is a card made from 2 tags glued together at the top - a super easy way to transform your tags into cards. The background is a mixture of Distress Stains and Glimmer Mist.


The gorgeous Shabby Flakes chippies are from Blue Fern Studios, and make such a perfect focal point for a tag, don't you think? I treated them simply with Weathered White embossing powder from Ranger for a textured finish. 


I used the same colors of Distress Stain and Glimmer Mist to stain the seam binding ribbon.

Thanks for stopping by today. I wish you and your family a very Merry Christmas and all the best for 2014!